Paolo Bascetta's stellated dodecahedron, also known as the Bascetta Star is, I think, the most well-known of Bascetta's creations. I also love this Compass Rose folded quite some time back. 

During these coronavirus times, I tried out yet another of his modulars - a modular 2D star, called the New Year's Day Star. While folding it, I was wondering if it was possible to restart this year, minus the pandemic! 

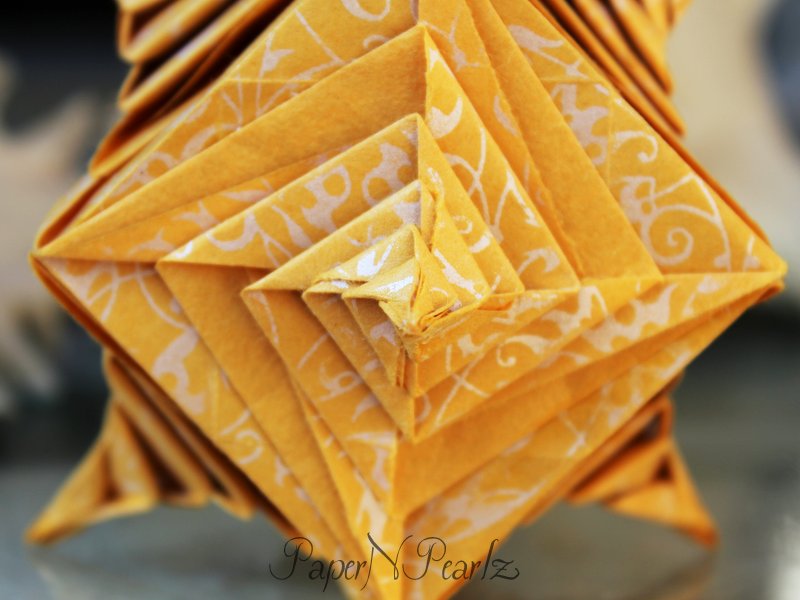
Coming back to the modular, it is folded from 18 modules and is similar to the Mette Ring. In the mette ring, the final step is folding the module into 2. This step is not included in the New Year's star. Instead, the unfolded modules are slipped into the little pockets to form the star. Though I assembled it with glue, it can be done without glue. I used 2 inch squares and 2 colours, in the classic black and white combination. And I quite like the way it has turned out. 


Model Details:

Model: New Year's Day Star

Creator: Paolo Bascetta

Difficulty Level: Low Intermediate

Paper Ratio: Square

Paper Size: 2 inches

Model Size: ~ 4 inches across

Number of Modules: 18

Tutorial: Youtube

Diagram: Free Download

Continuing with the project from my last post, I worked on a pen stand, using the same colour combination - dark purple, mauve and cream. It was again done using the coiling technique, using newspaper tubes.

Weaving the tray was easier because of the larger surface area. And another problem was maintaining evenness in the sides of the pen stand. I haven't completely succeeded in this regard!


The close up shows the colours and the smooth weave. And once I glazed it, I ended up with an incredibly strong pen stand! I just hope my brother likes it and finds it useful :)

And finally, here is a picture of the pen stand and the tray. I am quite pleased with how they have both turned out, but I think I will take a break from weaving using the coiling technique! It is quite time-consuming and frankly speaking, very addicting 😅😅


Model Details:

Model: Triangular Pen Stand

Difficulty Level: Complex

Tutorial (making newspaper tubes): Youtube

Tutorial (coiling or root-weaving technique): Youtube

After completing the woven Mother's Day bowl, it appears that I still am a glutton for punishment 😅😅 I tried out more of the coiling technique, using newspaper tubes. Well, I had a second reason for going ahead with this tray - my brother's birthday had just gone by and thanks to coronavirus, I was unable to gift him what I had wanted. So handmade it was!

The triangle is a shape I haven't attempted before and I am happy with the way it has turned out. I love the slight curve in the sides. I also added some tubes in the edge, as handles for the tray. I don't know what purpose they would serve, but I like the way they look!


As far as the colours go, I went with a combination of purple and cream tubes. The purple was in 2 shades, since I wanted to do a gradient in the weaving. The darker purple was achieved by adding a little black acrylic to mauve acrylic paint. This resulted in a rich dark purple which was a pleasure to work with! The lighter purple was mauve with a dab of white acrylic paint mixed in. I wasn't too happy with the way the cream turned out! I wanted a mellower version. I need to experiment more with this colour.


I love this closeup of the weaving! Absolutely adore the way it has turned out. The weaving is the smoothest I have achieved since I started experimenting with coiling or root weaving technique.

I have also decided on weaving a pen stand, using the same technique and the same colours. Will have to see how that works out!

Model Details:

Model: Triangular Tray

Difficulty Level: Complex

Tutorial (making newspaper tubes): Youtube

Tutorial (coiling or root-weaving technique): Youtube


Apparently, tissue holders continue to be my Achilles heel, when it comes to newspaper weaving! After my previous attempt at weaving a snail-shaped tissue holder, my second attempt did not turn out to be much more of a success! 

This time, my attempt was weaving an oval base with a couple of half rings. This is based on a combination of pictures I had seen on Pinterest. But while the theory was quite fine, the execution still needs work. 

On the plus side, I am very happy with the way the oval base turned out! This is one of the few times I have managed to weave an oval without distorting its shape! The rings, of course, need a lot of work! 

Model Details:


Model: Tissue holder


Difficulty Level: Complex

Tutorial (making newspaper tubes): Youtube


I love making origami earrings, especially since Little Miss is at an age where she appreciates and wears them! So recently I managed to dig out some of the earrings that I had made in the past and put them together so that she could use them as and when she wanted to. 

Her absolute favourite was the one made from red/gold chiyogami paper. This paper is amazing to make origami jewelry from - it has that rich look to it that adds so much elegance to the product. A couple of dangles and fish hooks completed this beautiful pair!


These pink earrings were folded from pearlised momogami paper. A couple of artificial pearls and the earring was ready to be worn. 


The final set that she liked was this black set made from black/gold chiyogami paper. I added some gold chains to the earrings and I thought it went well with the look and feel of this pair.


Today being Mother's Day, I wanted to make something for my mom. Well, with the lockdown in place due to the coronavirus, shopping was out of question. Which means, I decided to try out one of my newspaper weaving projects. And so was born the Mother's Day Bowl.

The idea behind the bowl was to use one theme colour, in this case black, along with other coordinating colours, for which I chose blue, yellow and pink.

I also wanted a very sturdy base, so made use of some plywood and drilled holes into them to form the centre of the bowl. I then coated them with black acrylic paint. This was the starting point of the bowl. From there, I decided on going with the coiling or root weaving technique. This is woven freestyle, without any form.

While I love the colour combination, the finish is still not up to the mark. Naturally, this will only come with practice and as the lockdown continues, hopefully I will master this technique of newspaper weaving!


Model Details:

Model: Mother's Day Bowl

Difficulty Level: Complex

Tutorial (making newspaper tubes): Youtube

Tutorial (coiling or root-weaving technique): Youtube

As I had said in my previous post, while making the origami spiral cube, I wanted to retry this model using A5 paper instead of A4. A4 paper resulted in a fairly large cube which wasn't very appealing to me.

The coronavirus lockdown has given me ample time, so I decided to redo the model, using some lovely kami paper that I had. The paper turned out perfect for this model, since it was light enough that I could fold the spirals and assemble it easily.

Usually smaller origami models are more difficult to do than bigger ones, but in this model, I found the smaller one easier to assemble! Mainly because it was small enough to hold in hand while folding. I would definitely recommend the A5 size to the A4!


Model Details:

Model: Spiral Cube

Creator: Tomoko Fuse

Book: Let's Fold Spirals

Author: Tomoko Fuse

Difficulty Level: High Intermediate

Paper Ratio: Rectangle

Paper Size: 8.3 inches * 1.45 inches

Model Size: ~2.5 inches across

Number of Modules: 12

Tutorial: kusuda.ru