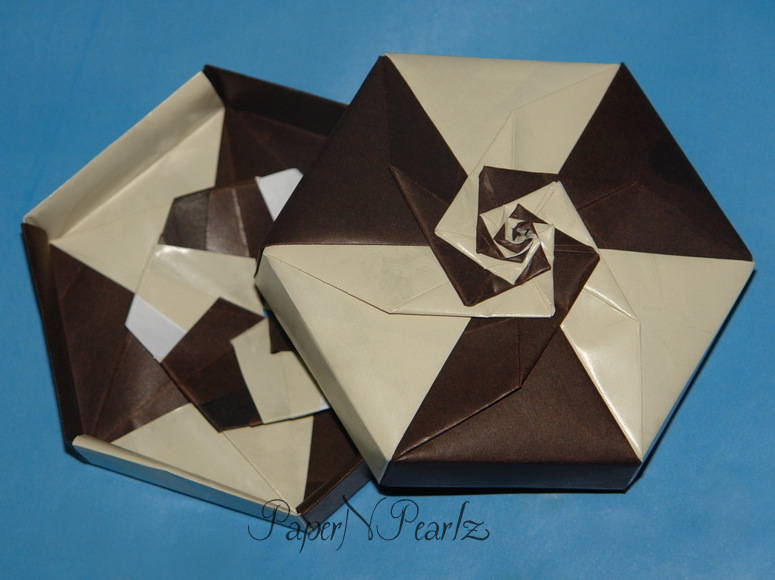
Showing posts with label box. Show all posts


Here's to a blessed new year 2021! Well, the year has had a good start for me and I was able to work on my first order for this year - a box made from newspaper tubes with a touch of decoupage. 

I am very happy to see the results of all the practice I have had during these past few months! Quite delighted with how pleasing and utilitarian this box turned out to be! 

The box is 8 inches in diameter and 10 inches in height. In this instance too, the client just specified that she wanted a big box with decoupage. So that meant, I got to choose the colours and the design!! Yay!!


I went for the peach/white combination from my last box as I absolutely love this decoupage tissue. I love how pleasing these roses are! The base was made from a cardboard and I started by gluing the sticks to the base. 

I used 2 patterns for the sides. The first was a 3-weave pattern as I wanted to accentuate the white. This was followed by a peach section, since I wanted the decoupage to stand out here. 

The lid also started with a cardboard base with decoupage on it. Quite happy with the way the decoupage turned out! In love with these little woven knobs! They are so adorable!!

Finally, I finished off with some round felt protectors, since the colour is quite light and I didn't want the box to turn dirty very quickly! 

So, here's to a year of newspaper weaving and plenty of orders 😄😄

Happy New Year 2021!

After the lovely origami that I folded last month, I decided that I wanted to do something in newspaper weaving that is a little big - big enough to contain a fair amount of stuff, rather than the usual, small pieces that I do. 
 
So that is what I did! This box, made of olive green and corn yellow, is the first of these boxes that I decided to weave. The idea was derived from some decoupage tissue, presented to me by my daughter, Little Miss. I am not sure decoupage will look good on small, woven works. Anyway, I have to try it out! But for now, this is what I did. 

The base of the box was cardboard, since I wasn't too keen on weaving such a big bottom! The box measures 8 inches in diameter and the cardboard is 6 inches in diameter. From that, I started my weaving.

Once I started weaving the sides, I wanted to try out some new techniques of weaving. Unfortunately, I don't know of the names! But I guess the pictures provide enough information! 😆


 Once the weaving was done, it was decoupage time. Frankly speaking, I am not too happy with the way this decoupage turned out! I think the bees and the flowers merge a little too much with the weaving! But, all is not lost! I will try this same technique again with a different decoupage paper and hopefully that will come out well!

Model Details:

Model: Leaf Tray

Difficulty Level: Complex

Tutorial (making newspaper tubes): Youtube

So, after the last post on all the popular origami from last year, I realised that newspaper weaving was lagging behind. So I decided to try and complete at least 12 projects of newspaper weaving this year.

With that goal in mind, this is my first attempt - a newspaper woven little jewellery box with a lid. This is the first time I am attempting a proper lid, which will fit the box. My last attempt was rather rudimentary and I was not at all happy with that. While this is a definite improvement, I have ways to go before I can be really happy with this.

As is evident, this was also woven using the coiling technique. I guess I will attempt a few more projects using the same method. These tubes were coloured dark brown, using wood stain.


 Model Details:

Model: Coiled Box with lid

Difficulty Level: Complex

Tutorial (making newspaper tubes): Youtube

Tutorial (coiling or root-weaving technique): Youtube


I have rolled up tubes for a Christmas project but before that, decided to try out a little box with lid using the red/green combination. I have tried this method before, when I made a blue tray, but since it's been a long time since I did that, this box and lid is kind of a refresher course for me 😀
I liked the way this box came out. I added a little ring to the lid so that it is easy to open the box. The overall size is about 4 inches in diameter and about 3 inches in height.

The problem I faced was making a little indent for the lid so that it doesn't slide off easily. I am still to  figure out how to weave the lid. For this box, all I did was stick a couple of tubes to form the indent.

For this box, instead of using white tubes, I used tubes with print, painted red and green. In the close up shot, a little bit of the print is still visible, but of course, this cannot be avoided. I think the only colour which will completely obliterate the print is black.


Model Details:

Model: Coiled Box with lid

Difficulty Level: Complex

Tutorial (making newspaper tubes): Youtube

Tutorial (coiling or root-weaving technique): Youtube

After the strenuous coiled or root-woven tray from my last post, I was more than happy to try out this acorn box made from black newspaper tubes.

I have been trying out various acrylic colours which will completely blot out any print in my newspaper tubes. For the lighter colours, I have no choice but to use white or mostly-white tubes. Otherwise the print is very obviously visible and I just don't like it. As a consequence, I find that I am left out with a  lot of tubes that have newspaper print/coloured pictures on them.

One way to go is to use them as-is and weave my boxes with the print and pictures visible in the end product. I find that there are a lot of people who like this and I have had some orders where I have been specifically asked to use the newspaper tubes without any colours added.

On the other hand, I have also been experimenting with dark colours that I can use on these tubes, to hide the print, and the very best colour is, of course, black. Other than black, dark blue, prussian blue, deep red and dark green also work well.


So for my acorn box, I have used black tubes to form the base and the lid. The base was woven with a form, which was a plastic bowl of the required size. I tried out a 3-strand weaving, which I liked very much. The lid started off as a flat plate, with the edges turned down to convert into a lid. I added the little knob at the very end.

Model Details:

Model: Black Acorn Box

Difficulty Level: High Intermediate

Tutorial (making newspaper tubes): Youtube

For the very first time, Little Miss went on a trip without me! She had gone on a weekend trip with her grand parents and her uncle's family. Well, more heart-rending for the mom than for the daughter, I think! 😆

Anyway, during this trip, my wonderfully thoughtful little girl decided to buy something for my husband and for me. She put in a lot of thought into the gifts and we feel blessed to receive them. For my husband, she got a shirt in his favourite colour and for me, she bought some gorgeous origami washi paper in a variety of colours! I am truly touched.

So such a thoughtful gift required a well thought-out origami. So after a lot of research - and I assure you I did quite a bit of research - I decided to make this beautiful pyramid box by the wonderfully amazing Tomoko Fuse.

Absolutely love the way it has turned out. And Little Miss also liked what I finally came up with :) The model is taken from the book 'Origami Boxes' by Tomoko Fuse and is published by Tuttle Publishing. The first part of the book starts with a lot of variations to the traditional Masu box, followed by the Pyramid Box and finally, the Dome Box. Part 2 deals with modular boxes from square sheets of paper. Finally, Part 3 deals with modular boxes made from rectangular sheets of paper. It is a very good book, I thought, with a lot of colourful pictures to help one visualise better.

As for the Pyramid Box, each box is made from 2 sheets of origami paper, 6 inches squares. The steps are not very difficult to follow, though the final collapse when making the lid might prove a little challenging initially. A variation is also shown for the lid - that is the yellow box in the picture above. For the base, Tomoko Fuse has also kindly provided instructions for increasing the size of the base and also instructions to make it more sturdy. The base is, of course, easier to make than the lid.

Altogether, a good origami project to work on and I thought, a fitting use of some lovely washi paper.

Model Details:

Model: Pyramid Box

Creator: Tomoko Fuse

Book: Origami Boxes

Author: Tomoko Fuse

Difficulty Level: Low Intermediate

Paper Ratio: Square

Paper Size: 6 inches

Model Size: 2.5 inches across and 2.5 inches in height

Recently, I had the pleasure of being a part of a farewell party for outgoing students of a class. This was the culmination of a 2-year intense study for a masters degree. Naturally both the outgoing students and the students who were giving the farewell were very excited and at the same time emotional.

For me, it was a chance to be around young minds, marvel at their creativity and guide them when I could. Given that origami is one of my keen interests, the students wanted me to incorporate a little bit of origami in their celebrations. So when I came across this idea of making invitation boxes using origami, I went ahead and did exactly that!

Since black and white were the event colours and personalised invitations were the need of the hour, I chose a variety of black and white single sided paper to make the invites. The paper is fairly thick, 120 gsm, which means the folding is not very complex 😀

The photo above is the invitation in the closed position. The 2 halves of the heart serve as handles to open up the invite. See below for the open one.


Model Details:

Model: Invitation Box

Origin: Traditional 

Difficulty Level: Simple

Paper Ratio: Square or Rectangle

Paper Size: 12 inches * 7 inches (While the tutorial calls for a square sheet of paper, since I wanted a different size invitation (4*3 inches), I worked with a rectangle sheet of paper.

Model Size: ~4 * 3 inches

Tutorial: Youtube

So, turns out that newspaper tubes that actually show the newspaper are very popular. I have had repeated demands to make more such products and that is exactly what I have done.

This box, made from brown and yellow newspaper tubes, is about 6 inches tall and has a diameter of around 4 inches. For relief, I added some brown wooden beads. And I am also figuring out how to add an indent at the edge, so that the lid fits in well. I still have not perfected this bit, but I believe I will eventually get it 😊


Altogether, I am pleased with the outcome. Still some way to go before I am perfectly happy with what I make, but not too shabby for now, huh? 

Magazine art is an interesting way of recycling old magazines, which are in abundance at our house. So, after making all those pen holders last month, I decided to try about something else this time.

So here is my first attempt at decoupaging with magazine paper! And here's how I went about it.

First of all, I wanted a good, solid box. So, while a good cardboard box would have been good enough, I wanted something sturdier. That means, I decided to use an old wooden box for this attempt.

I sanded down the box and then coated it with a layer of white acrylic paint. Once the paint dried, it was time to decoupage! I mixed a portion of white glue with 2 portions of water and set this aside. I chose the most colourful pages and cut them into multiple pieces.

Then it was just a matter of applying the glue-water mixture, sticking a piece of magazine paper and reapplying another layer of glue-water mixture. I continued till the whole box was covered with the magazine paper. I decoupaged the inside of the box as well. And the lid too.

I allowed the box to dry down over-night. Then I covered the whole box with a layer of the same glue-water mixture. Again it dried over-night.

Finally my decoupaged box was ready for use. Now my only question is whether to use it as a decoupaged box or do something with magazine rolls.. Well, I'll just have to wait and see how I decide to go about it 😃

'Joyful Origami Boxes' by Tomoko Fuse is an amazing book if you like folding origami boxes. I had previously tried out a couple of the models from the book - The Heptagon Starry Pinwheel Box and the Hexagon Pinwheel Box. But this was way back in 2011, so when I got another opportunity to fold something from this book, I decided to try out the Octagon series.

Similar to the Hexagon and Heptagon boxes, Tomoko Fuse has given detailed instructions for making quite a few Octagon boxes - Pinwheel, Flowery Pinwheel, Starry Pinwheel and Double Pinwheel are some of the variations she has detailed in the book.

What I have folded is the Octagon Box - Plain, found on page 69. The folding is pretty straight forward and as always, steps are accurately described. Assembly was also fairly easy. I used coloured printer paper, so that the box is nice and strong.

I do hope to fold more of these boxes in the coming days. Page 72 gives a list of variations on the Octagon Box and this is something I absolutely want to try.

Model Details:

Model: Octagon Plain Box

Creator: Tomoko Fuse

Book: Joyful Origami Boxes

Author: Tomoko Fuse

Difficulty Level: Low Intermediate

Paper Ratio: Square

Paper Size: 3.5 inches

Model Size: ~3.5 inches across and 0.75 inches in height

Number of Modules: 16

A round storage box measuring 6 inches tall and 9.5 inches across is my latest foray into the art of newspaper weaving. For this container, I did not paint the tubes, but rather used the regular newspaper tubes with print, to weave the box. Once everything, including the lid, was completed, I painted everything with white acrylic paint. While I was able to get a good, white container, I must say it is much less tedious to paint the tubes before weaving! Painting the nooks and crannies of the completed object is really really tiresome.

Finally, to add some colour, I included some decoupage using decoupage napkins and I must say I love the effect.

The lid has a little bow on top, though it turned out a little too small. But it works as an effective handle.

As soon as the work was done and everything dried up and hardened, Little Miss came right along and picked up the container and declared that it was hers as she had absolutely nothing to store her things! 😄 So that was that. Apparently if I needed one for myself, I better make another one, this one was not available..


We had recently been on a short trip to the sea, for the summer. And while doing some shopping, I came across an amazing shop which had some fabulous wrapper paper in some awesome colours and patterns. So I ended up picking up a whole lot of paper and now I have enough to last me a lifetime!!

The cream and chocolate brown papers in this hexagon box were a couple of sheets I picked up there. The moment I saw the paper, I fell in love with it and have been trying to decide on the model. Finally I decided to make one of Tomoko Fuse’s beautiful boxes from her book on spirals.

The paper was thicker than regular origami paper, so the box turned out to be quite sturdy, though it required more effort in folding and assembling. The spirals were difficult because of handling 6 arms simultaneously but the end result was so satisfying that I just sat and admired the box for about half an hour after I had completed it!


Model Details:

Model: Hexagon Box 

Creator: Tomoko Fuse

Book: Let’s Fold Spirals
 

Author: Tomoko Fuse
 

Difficulty Level: High Intermediate

Paper Ratio: Square

Paper Size: 6 inches

Modules: 12 (6 + 6)

This month's theme at the Origami Society of Madras is Boxes! Yay! Love it :)

So I got cracking with this octagonal box by the ever-prolific Tomoko Fuse. I have this absolute fascination for boxes with spirals. I am always astounded by how beautifully elegant they look! So I worked on this spiral box from Tomoko Fuse's 'Let's Fold Spirals'.

A couple of years back, I had completed yet another spiral box - a hexagon and I love that box. I still have it and it is still as sturdy as ever. The octagon box, though, isn't as sturdy as the hexagon box because of the way it is constructed. This box is made from 4 modules for the lid and 4 for the base. And each module forms 2 sides of the octagon.

I had used 80 gsm paper (love the rather Christmassy look that the red/green combination brings in!) which gave stability to the box. Thicker paper should work much better though.

Model Details:

Model: Octagonal Box with Spirals 

Creator: Tomoko Fuse

Book: Let's Fold Spirals
 

Author: Tomoko Fuse
 

Difficulty Level: High Intermediate

Paper Ratio: Square

Paper Size: 5 inches

Model Size: ~4 inches across and 2 inches tall (including spiral)

Modules: 8 (4 + 4)

The Stand in the Corner of the Desk Drawer Box (Whew! That is a mouthful!) is deceptively simple box/pen stand designed by Thoki Yenn, the well known designer of origami magic rings.

The stand is folded from a A4 sheet. I would suggest regular copy paper or something thicker for folding this model. Copy paper results in a pretty good stand, but the best stand is from scrapbooking paper (160 gsm or more).

Some things that I did incorrectly the first time (Diagram link below):

1. In Step 2, when making the 3 vertical folds, start from the left. The first fold is made at the diagonal nick made in Step 1.

2. Step 4 - easier if these are made as mountain folds rather than valley folds.

3. In Step 6, the little crease between the first vertical and the 3rd horizontal creases does not extend up to the 2rd horizontal crease, but with the crease before that.

4. Same with the next crease (between the first vertical and 4th horizontal creases). This is not so well defined as the previous crease and the first time I folded the box, I didn't make this crease, rather folded it while collapsing along the other pre creases.

In case you are giving this model a try, I hope that helps :)


Model Details:

Model: Stand In The Corner Box

Creator: Thoki Yenn

Difficulty Level: Low Intermediate

Paper Ratio: A4

Model Size: ~2.5 inches tall

Instructions: Erik Demaine

A couple of years ago, I had attempted these heart boxes by Robin Glynn for the first time. While I had not perfected it, it still turned out great. So this time, with Valentine's Day coming up, I decided to give it a go again.

This time, I wanted to make it sturdier, so attempted it with thicker paper. That is, with 120 gsm from some of the paper packs that I had with me. So, in addition to being really pretty, these boxes also turned out to be functional.


The pink and white boxes are my absolute favourites. Naturally, these boxes have been duly handed over to Little Miss! She apparently is once again in need of boxes for her things!


The blue box, termed "Love is in the air", was specially requested by a friend.

And with that, we come to the end of the post :)

This gift box, designed by Robin Glynn, is yet another of his economical designs. The entire box, including the closure at the top, is made from a single square of paper.

A 6-inch square gives a small box (about 2 inches in size, 1 inch in depth) that would be a good size for a ring, or a pair of small earrings. A bigger square, say 8 inches, results in a slightly bigger box, about 3 inches in size and about 1.5 inches in depth.

The paper I first used was the usual origami paper. Not good for the box. The sides are not strong, since it isn't a modular box, so it cannot serve any purpose. I then tried with scrapbooking paper, 160 gsm heavy paper. This was perfect. The open box was from a 6-inch 160 gsm paper, with a woodsy appearance. My favourite though, is the black and white box, made from an 8-inch 160 gsm paper.


Model Details:

Model: Gift Box 

Creator: Robin Glynn

Difficulty Level: Low Intermediate

Paper Ratio: Square

Paper Size: 6 - 8 inches

Model Size: 6 inch square results in a box of side 2 inches and depth 1 inch
8 inch square results in a box of side 3 inches and depth 1.5 inches

Tutorial: Youtube

Diagram: Origami Diagram

When I had posted these masu boxes earlier, a friend of my mother's, a very creative lady herself, had remarked on my Facebook page that these boxes very amazingly beautiful :) Well, that gave me quite a high! And got me busily working on the tutorial that I had promised in the post.

On an aside - If you have followed my previous tutorials, I usually make them from Google's Picasa's collages. But lucky me, I found a new collage maker called 'Picture Collage Maker Pro'. I found the software remarkably easy to use and am quite fond of this new tutorial! What do you think? Is it better than my previous ones?

Well, to continue with my tutorial, today I will post the one for making the actual masu box. It is relatively simple and can be done in 10 minutes, tops.

Time Required: ~10 minutes
Difficulty Level: Simple
What is needed: 

  • 2 squares of paper, both measuring around 8 inches.
  • Pencil or pen to make some markings
  • Paper clips
  • Glue
How to Fold:


1. I am using paper coloured on a single side, yellow for the base and green for the lid.

2. Well, the yellow will be the one in this tutorial.

3. Flip the paper over so that the white side is facing up.

4. Fold along the diagonal and pinch the centre. Don't crease the entire diagonal. You are just trying to find a centre point.

5. Open. Fold along the other diagonal and again, pinch the centre.


6. The two pinches from Steps 4 and 5 should have intersected at the centre. I have marked it with 2 perpendicular lines. You can mark it with a pencil if it isn't very clear.

7. Fold the 4 corners to these markings and crease well.

8. Unfold 2 opposite flaps.

9. Fold the folded edge to the centre as shown.


10. Repeat for the opposite flap.

11. Open up fully and turn it over so that the coloured sided faces you.

12. Fold in half so that one edge meets the other but don't crease fully. Only crease from the edges till you hit the creases made in Steps 9 and 10. Repeat for the other edge.

13. Unfold and turn over so that the white side faces you. You have now completed all creases for folding the box!


14. Fold opposite corners to the centre.

15. Lift the 2 sides on existing creases (made in Steps 9 and 10) and push in the the corners on the third side. The paper will naturally fold in on the crease made in Step 12. Use paper clips, if required, to hold in place.

16. Fold it down inside and crease well. You now have 3 sides completed :)

17. Repeat on the opposite side and you are done!

The flaps inside the box can be glued down for a cleaner look. If you wish to do that, please hold on till my next tutorial, cos we need to undo this box a bit, to get the right side for the corresponding lid.

The 8 cornered box or vase is a traditional origami that is made from a single sheet of paper. It starts off with a frog base. The origami is essentially a simple origami to make, though it involves a fair number of steps to complete.

Printer paper or other similarly thick (ie., 80 gsm) paper works well for this model. Thicker 120 gsm paper can also be used.

Model Details:

Model: 8 Pointed Star Box 

Origin: Traditional

Difficulty Level: Simple

Paper Ratio: Square

Paper Size: 8 inch squares

Model Size: ~3 inches in diameter and 2 inches in height

Instructions: Marigami's Site

Tutorial: Youtube

The Origami 4-star box is one of the very few models that I was able to fold from the Origami Tanteidan Vol 17. I was actually quite delighted to find that I could actually fold one of the models, given the complexity of the origami!

The box is a modular pattern, 4 modules for the lid and 4 for the base. The lid and base are folded in the same way except (1) the walls of the base are higher than the lid and (2) the spiral of the base is folded into the model so that it isn't visible at the base.

I found the model interesting to fold in that, usual modular boxes are folded as 2D and in the final step they are converted into 3D. But in this one, the model no longer lies flat from the second step after the precreasing. And of course, the folding the spiral into the base wall was also something new.

Model Details:

Model: Four Star Box

Creator: Toshikazu Kawasaki

Book: Origami Tanteidan, Volume 17

Difficulty Level: High Intermediate

Paper Ratio: Square

Paper Size: 5 inches squares

Modules: 4 for base and 4 for lid


After trying Yuri Shumakov's vase yesterday, I decided to try out the next vase - or rather, box - by Katrin Shumakov.

The Bonsai Box is a popular origami box, designed by Katrin Shumakov. As boxes go, this is a complex origami, one that I have always been scared of trying, thinking that it will be too complex for me.

Now that I finally tried it out, I realised that it wasn't as complex as I feared! The best part of the box is that, unlike the other boxes/vases from Oriland, this has a good, wide mouth, that makes it a very convenient box to hold little things that are always scattered around my house.

Model Details:

Model: Bonsai Box 

Creator: Katrin Shumakov

Difficulty Level: High Intermediate

Paper Ratio: Square

Paper Size: 8 inches

Tutorial: Youtube