Philip Chapman-Bell's origami creations on Flickr has got such beautifully flowing and aesthetically pleasing lines that, when I came across the instructions for making the Zhoubi bowl, I didn't hesitate to try it out.

He notes on his blog, The Fitful Flog, that the design is based on an illustration from an ancient Chinese mathematics text. The bowl, which starts with dividing into sevenths, is relatively easy to fold and results finally in an elegant piece of origami.

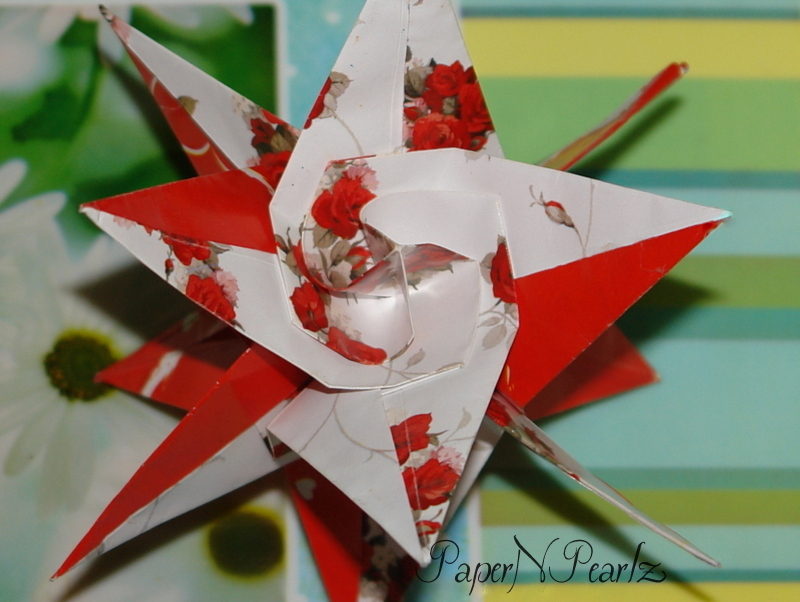
For folding this bowl, I used leftover wall paper in dark brown and ivory cream. The thickness of the wall paper meant the bowl was fairly sturdy and the patterns and texture of the paper stand out beautifully. A square of at least 8 inches is needed. Else the bowl would be too small to serve any purpose. The bowls I have made are now Little Miss's clip bowls.


Model Details:

Model: Zhoubi Bowl 

Creator: Philip Chapman-Bell

Difficulty Level: Low Intermediate

Paper Ratio: Square

Paper Size: 9 inch squares

Model Size: ~7 inches from tip to tip

Instructions: Steve's Paper


SaveSave

Today is Good Friday, the day when Christ's crucifixion and death on the cross is remembered by Christians world over.

On this day of sacrifice, I folded this traditional cross from a strip of paper in the ratio 1:30. We usually fold this cross from palm leaves on Palm Sunday, but to me, the meaning of the cross is more profound on Good Friday. So I love folding this cross every year on this day to remind myself of Christ's amazing sacrifice for man.

I usually make this cross from 10 mm quilling strip - the perfect paper for making strip origami, be it stars or crosses! Here though, I have used single-sided paper and this has given me a small square in the centre.

Model Details:

Model: Cross 

Origin: Traditional

Difficulty Level: Simple

Paper Ratio: Strip

Paper Size: 1 cm by 30 cms

Instructions: Origami Resource Center 

These earrings are made from a variation of the sonobe units, created by Mitsonobu Sonobe. They are easy to make and look very elegant. They actually look much prettier that this :) My photographic skills at fault here.

They are made up of 3 modules each. Each module takes about a minute to make, so creating the unit takes about 10 minutes maximum! Add a couple of beads and earring hooks and voila! You have a very nice pair of earrings.

I initially tried making it with 1 inch squares, but they turned out to be too small and all details were lost. This is made from 1.5 inch squares. I guess even 2 inch squares will look good.


Model Details:

Model: Diamond Earrings from Sonobe Units 

Creator: Mitsonobu Sonobe

Difficulty Level: Simple

Paper Ratio: Square

Paper Size: 1.5 inches

Modules: 3

Tutorial: Youtube 


The spiral star is very elegant, intricate-looking origami which is surprisingly easy to make. Assembling the piece is quite easy if you use a cheat's way out.. some paper clips to hold the sides together :D

The modules start with a bird base. They are then twisted into spirals and then the modules are attached along the arms.

I loved the colour combination of red and white that I had chosen for this piece. And I loved the way the photographs have come out too.

Model Details:

Model: Spiral Star 

Creator: Grzegorz Bubniak

Difficulty Level: Low Intermediate

Paper Ratio: Square

Paper Size: 5 inches

Modules: 6

Crease Pattern: Gregorigami

Tutorial: Youtube 

There are plenty of origami vases, ranging from the ultra simple to the super complex. This vase is a simple one and shouldn't take a few minutes to complete.

As with a lot of my origami, I folded this from wrapper paper. I love how both these vases turned out! The glossiness in the paper adds a shine which looks great in my opinion.

The vase does require glue to hold the folds in place, but is still a good design to fold.

Now all that remains is making the roses/flowers that should go into the vase :)

Model Details:

Model: Chinese Vase 

Origin: Traditional

Difficulty Level: Simple

Paper Ratio: Square

Paper Size: 6 inches

Tutorial: Youtube 

So, remember the kiddie bracelets that I had made about a month back? For my daughter and her friends? And remember I promised a tutorial for that?? So here is my promised tutorial. It is quite simple to make, so have a go..

What you will need:
  • Rectangular pieces of paper. You will need an even number of pieces. Around 20 - 22 pieces works for a regular size. You might need more or less depending on the size of the pieces.
  • If the paper you are using is thick (like copy paper, handmade paper, wrapper paper) and if the edges are smooth (if you have used scissors or a paper cutter, then the edges will be smooth), then cut out rectangles in the ratio 1:4. 1 inches by 4 inches is a good size to start with.
  • If the paper you are using is thin (like most magazine paper) or if the paper does not have even edges, then cut out rectangles in the ratio 1:2. 2 inches by 4 inches is the usual size I use for bracelets I make for adults. 1.5 inches by 3 inches works well for my daughter's bracelets.
  • Tweezers or something sharp to help insert the last bit
Instructions:

Making the Unit - Type 1


If you have cut rectangles in the ratio 1:4, then make units following these steps (Click the picture above for a larger image):
  1. I have used 3 colours for the bracelet. White, black/white, black.
  2. Fold the rectangle in half, along the longer edge.
  3. Fold in half to form a smaller version of the long rectangle. This is the completed unit. Repeat the same steps for the remaining units as well.
Making the Unit - Type 2


If you have cut rectangles in the ratio 1:2, then make units following these steps. There are a couple more steps involved, but the resulting braclet is sturdier than the first one. (Click the picture above for a larger image):
  1. I used wrapper paper with a blue design on the front and plain blue on the back. I have started with the plain blue at the top.
  2. Fold in half length-wise.
  3. Unfold.
  4. Fold the right edge to the central crease from Step 2.
  5. Repeat with the left edge.
  6. Refold along the central crease from Step 2.
  7. Fold in half, from top to bottom. This is the completed unit. Repeat for the remaining units.
Making the Bracelet Chain

  1. All the units beautifully folded before making the bracelet! :)
  2. Hold one unit vertically and fold another unit around it horizontally, leaving enough space for inserting another unit. In the picture, the white is wrapped around the black.
  3. Fold the leg of the vertical piece as shown. The leg will now aligned with the horizontal unit.
  4. Fold the triangular leg back so that it lies on the horizontal unit. The clip is not necessary. I just needed something to hold the fold in place while photographing it!
  5. Flip over so that the edge AB becomes BA. The leg is now at the top.
  6. Repeat Step 3 again, as in the picture.
  7. Fold over the triangular leg as in Step 4.
  8. Add the next unit, this time horizontally.
  9. Repeat the steps, folding the traingular bit and folding back over the previous unit.
  10. Flip over, so AB becomes BA. And repeat the steps. Continue till you have the required length of bracelet.
Completing the Bracelet: 

  1. Once you have completed the required length of bracelet, you will need to complete your bracelet. For this, take the last legs of the unit and insert into the space you left in the first unit of the bracelet.
  2. You will need to put in a little effort, along with efforts from a tweezer in all probability, to ensure that all the bits and pieces are pushed into the little space.
  3. You will need to repeat the same steps, to form the triangle and fold back.
  4. You will need to repeat the same steps, to form the triangle and fold back.
  5. The bit that is standing out has to be pushed behind the unit below that. Repeat the same with the other leg. This will go on the inside. A little more effort than the front leg, but not too difficult.
  6. Annnnnd... Tada!! Your bracelet is complete :)

The first time I saw pics of this basket on google, I badly wanted to make it, but couldn't find the instructions anywhere. And when I finally found them a few days back on bloomize (link below), I just had to try them out and they came out quite well too..

These baskets look best when made in double sided paper that is thicker than the regular origami paper. The basket came out well, though I had some problem making the handle and finally had to resort to glue. The orange and white basket is made from single sided paper. Both the baskets were made from 10 inch paper and as you can see, it came out quite big and broad.

And in addition to being cute, they also serve well as Easter baskets and for carrying little toys :)


Model Details:

Model: Wide Basket 

Difficulty Level: Simple

Paper Ratio: Square

Paper Size: 10 inches

Tutorial: Bloomize