With Christmas just round the corner, there is no better time to fold Santas, is there? I tried this Santa because of how natural he looks. I think all that this Santa is missing, is his big sack of toys!

The model has been adapted by Steve and Megumi Biddle, from the original one created by Steve Casey, and can be found in the book 'Essential Origami'. This book is a good place to start for beginners and the Santa is one of the more advanced models.

This Santa cannot stand by himself, so I added wire loop to his cap, and now he occupies his own special place on our Christmas tree!

Model Details:

Model: Santa Claus

Creators: Steve and Megumi Biddle

Book: Essential Origami

Authors: Steve and Megumi Biddle

Difficulty Level: Low Intermediate

Paper Ratio: Square

Paper Size: 6 inches

Model Size: ~3.5 inches

Our Church Choir had recently gone on a 2-day trip to a nearby hill station. We usually make it a point to go out together, at least once a year to a resort or a hill station. At the least it gets us away from our busy lives and since a lot of our choristers are students, it gets them away from their studies, which absolutely delights them! About 20 of us had come for the trip and we had a truly lovely time. We had stayed at a Christian retreat centre, a lovely, well-maintained place, full of flowers and trees and absolutely picturesque.


Well, there were about 8 girls (well, not exactly girls, since ours ages ranged from the 20s to the 30s!! But hey, we were all young at heart :)) and about 8 also-young-at-heart guys. The rest were the super-seniors - those in their 50s and 60s, including our choir master and other long-time pillars of our choir. And with such equally distributed ratio of girls and guys, competitions were inevitable. This time, we had a quiz competition - girls vs guys.


There was no specific topic - anything from anywhere would do. One of our long-term choristers had prepared the quiz and he had done an excellent job of it. We loved playing the quiz. We had assembled in one of the rooms we were staying in. All the rooms had bunk-beds, which is very cool to sleep in, by the way! The girls settled down at the top of the bunk-beds and the guys took the lower beds. Once we settled down, the quiz began. It was fast and exciting!


The rules were simple - 30 seconds to answer a question, 10 points for a correct answer, 5 point when a question was passed on. Some of the questions (answers at the end of the post):

  • When was the Book of Revelation written?
  • What is the longest river in the world?
  • What book does Torah, Neviim, Ketuvim represent?
  • What is the heaviest element in the world?
  • Washburn, Dobro resonator, Stratocastor - what are these associated with?

  • What is the largest moon in the Universe?
  • In the Bible, which community worshipped Baal?
  • Which city was the centre of Renaissance art?
  • Which is the company with the most employees?
  • What language was the Old Testament written in?
And finally, we come to the purpose of this post! Well, the girls won the quiz, albeit by a narrow margin! The prize was to be any original gift that the girls liked, which fell within the budget. I was amazed when all of them suggested a handmade paper bracelet from PaperNPearlz!


Of course, they wanted it customized. So I gave them an option of butterfly or star bracelets and they got to choose their colours. All of them chose butterflies. As for the colours, as you can see, pinks abounded. The next favourite colour was purple. As much as possible, I added little touches which I thought would be appreciated. One of the bracelets had little jingles in it. Butterfly beads, round and tear drop crystals for a few others. One of the purple bracelets had little lavender pearls and personally this was my favourite.


Of the photos, my favourite turned out to be the pink bracelet, laid out into an off-centre hyperbole. I liked the combination of dark-brown background and pink butterflies, with just a tinge of green from the stem.
Overall, this has been a very exciting, but tiring experience for me. Making about 35 - 40 paper butterflies and turning them into bracelets is no joke - makes me appreciate all those handmade creators around the world! The photography part of this project was also an eye-opener. I had to experiment with so many backgrounds and colours.


I even ended up making a small, inexpensive light box, to provide the right light diffusion and a uniform background. 

And finally, to the answers to the quiz questions:
1. 1 AD
2. Amazon
3. Old Testament
4. Osmium
5. Guitar
6. Ganymede
7. Canaanites
8. Florence
9. Walmart
10. Hebrew

And with that, I come to the end of a rather long post!

The Origami Tornado Kusudama is a beautiful modular origami designed by Aldo Marcell, an amazing Nicaraguan origami artist. This model is assembled from 30 modules. It works best with duo-coloured paper. In recent days, I have developed a special fondness for purple/lavender colour combination and I went for the same combination again. And am quite happy with the way it has turned out!

The model reminds me of Enrica Drey's Dodecahedron Kusudama, which is made from 60 modules. But the change in colour in the Tornado beautifully brings out the swirls, which I like very much :)

Folding the individual modules was easy. But I did find that the assembly was more difficult than most other kusudamas I have folded. I had to use a lot more paper clips than usual! And finally I ended up gluing some of the more untameable bits down!

Model Details:

Model: Tornado 

Creator: Aldo Marcell

Difficulty Level: High Intermediate

Paper Ratio: Square

Paper Size: 3 inch squares

Model Size: ~4 inches in diameter

Modules: 30

Tutorial: Youtube 

The Igel Kusudama is a modular origami designed by the amazingly creative Lukasheva Ekaterina. The model is assembled from 30 units. The units are east to fold and easy to assemble.

The model works best with duo-coloured paper, which I haven't used! For a single-sided paper, darker colours would work great, which I discovered to my dismay, when I assembled the model!  The shades of green that I have used, made the model a bit too dull. But nonetheless, it is a great model to fold.

The curls give a flowery appearance, which I liked very much. For a more angular version of the model, just stop before curling the little petals.

Model Details:

Model: Igel Kusudama 

Creator: Lukasheva Ekaterina

Difficulty Level: Low Intermediate

Paper Ratio: Square

Paper Size: 3 inches

Model Size: ~4.5 inches in diameter

Modules: 30

Instructions: Kusudama.me

Tutorial: Youtube 

Let me start off by saying that the more I read about origami snapology, the more information I find! Plenty of tutorials are available to make the basic snapology unit. As for assembling the units into various polyhedra, there are tutorials for assembling the Icosahedron but all other polyhedra are strictly DIYs :) But once we understand the polyhedral shapes, using snapology units to form those shapes is fascinating, though challenging.

To start off with the basics, snapology is a term coined by Heinz Strobl and involves folding units from paper strips. The beauty of snapology is that, these units can be used to form any polyhedra, starting from the Tetrahedron (4 vertices and 4 triangular faces) to the complex Truncated Icosidodecahedron (120 vertices and 63 polygonal faces!).

The basic snapology units are assembled along the wire frame of a polyhedra (for a polyhedral solid, when the faces of the solid are removed, the edges along remain. These edges, that retain the shape of the solid, is the wire frame) to form the various shapes. Each unit has 2 parts - a strip that forms the basic shape (a triangle for the icosahedra in this post) and a second strip that acts as a connector and links 2 shapes.

The icosahedra has a total of 12 vertices and 20 triangular faces. So we need 20 strips to form the 20 triangles. To determine the number of connector units, we need to determine the number of edges that the polyhedron has. Here's where a little Maths helps - the Euler's formula, which goes thus:

Euler's Formula:

V + F - E = 2
where V = number of vertices, F = number of faces and E = number of edges

We need E, so the formula works out as
E = V + F - 2

For the icosahedron, E = 12 + 20 - 2 = 30.

So, we need a total of 50 strips (20 for the triangles and 30 for the connectors). I used A4 sized paper, cut into 8 strips each, which I then cut into halves. So a single A4 gave me 16 strips. So 3 A4 sheets + 1 additional strip gave me the 50 strips I required.


Model Details:

Model: Icosahedron using Snapology 

Creator: Heinz Strobl

Difficulty Level: Low Intermediate

Paper Ratio: A4 paper cut into 8 strips

Model Size: ~4 inches tall

Instructions: Haligami

Tutorial: Youtube

In the past couple of years, I have made and sold quite a few of my origami earrings online. This has been a fairly easy job for me, since I could make the earrings I wanted and put them up for sale when I wanted to. There was no pressure and it helped me make more and more complex earrings.

This year, for the first time, I got a couple of opportunities to be a part of local market places that sold hand crafted goods. Since I have never been a part of such craft bazaars before, these experiences have been real eye openers!


Let me start off with the many lessons that I learnt during these forays: One - I could not gradually make earrings at my own pace! I needed enough earrings to at least cover the 2 tables that each stall would be provided with. And let me tell you, paper jewelry does NOT occupy space! So in the first event, even though I had about 200 pairs of earrings (Whew! Making them was an immense challenge! It felt like I was spending whole weeks at my work table..), my table looked half full! By the way, my earrings included leaf earrings, star earrings, umbrellas, pine cones, butterflies and hearts.


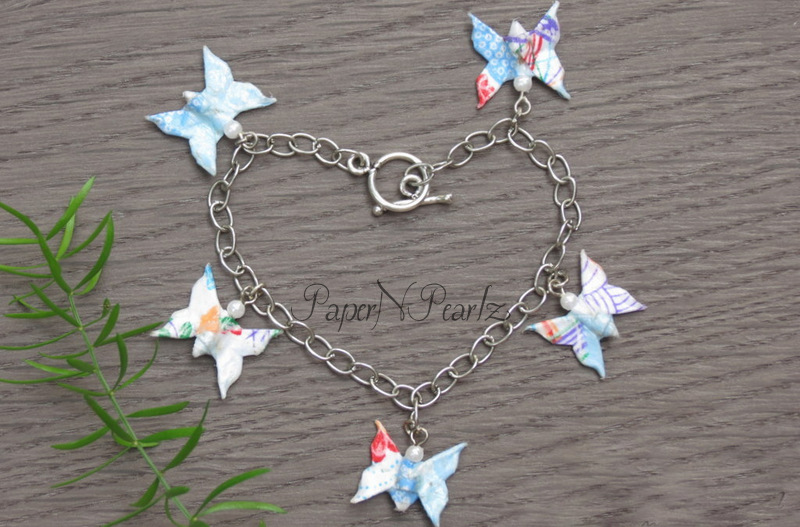
Two - So since my first stall looked hardly full, I decided that I need to diversify my jewelry. It was not sufficient that I made earrings, I needed to make things that take up space. So I started making bracelets and chains/necklaces. And that is what went into my second stall. I had a bigger variety of earrings - I included rose stud earrings, bird stud earrings, woven earrings, modular and wreath earrings. My bracelets included butterfly bracelets, star bracelets and bird bracelets. But still, I found that my tables did not look filled in!


Three - For my third event, I diversified even more! I included handmade bags, pillow boxes and little Christmas ornaments. And finally I was happy with the way my stall looked :)

Four - For a marketplace, it is not sufficient that you have just your products. In addition, a lot of accessories are needed. A major item was the packaging stuff. I needed boxes/zip lock packs to keep the jewelry in. Then I needed bags to put the boxes in. These bags also had to be handmade bags, to go with the handmade theme. I also found that having a stand listing the price of all the items was very useful. And a sign board was an absolute essential.


Now, these are things that I need not worry about in a online shop and they were all additional expenses! So now I absolutely need to participate in more events just to recuperate all that money that I have invested! :)

Five - A few of the buyers were not able to appreciate handmade works. To them, all I was using was paper. So they believed that I should be selling it for a 10th of the price I quoted. But thankfully, this was a minority. For the most part, people understood the effort that goes into handmade.


Among the positives, the biggest positive was the opportunity to meet a lot of handcraft enthusiasts who had put up stalls in the events. I was amazed at the creativity that I saw. Jewelry, clothes, greeting cards, paper bags, paintings, clay art, terra cotta jewelry, crocheted works - an absolutely mind-boggling array of talents were on display!

Two - I found a lot of people fascinated by paper jewelry! For a lot of them, this was the first time they were seeing something like that. In fact, a lot of them were not aware that my jewelry was made from paper. The moment I said that it was paper jewelry, they did a double take and immediately fingered the jewelry to check that it was in fact paper!


Then they had the usual questions on durability, water resistance etc.

Three - Children were fascinated  with the birds and stars. Young adults loved the butterflies. And those in their 30s were very appreciative of my rose studs. All of them were very appreciative of the effort. Quite a few of them were aware of origami and a few even knew that tiny roses were very difficult to fold. So they were all the more fascinated by the jewelry.


So these events have been learning, yet delightful experiences. I have made new crafter friends, I have got a list of people who want to learn origami, I have new clients who want specific jewelry in specific colours.

While I will continue with my online sale (it is hassle-free as compared to a bazaar!), I would love to participate in yet another event and exhibit more of my jewelry. Though, not any time soon!

I enjoy making paper bags from a variety of paper. Handmade bags make great gift bags, especially when the paper used is handmade paper. I find that scrapbooking paper results in some very beautiful bags, such as the 2 green bags in the pic. The one with polka dots was a big hit, when I had used it to gift a friend. The other green one, with mangoes, I have kept it aside to use later on. The bright red and green one is, of course, for Christmas and is made from handmade paper. The green patterns have a velvety feel to it, which made it difficult to glue but pretty to look at.


The cream and blue bags were made from some very beautiful handmade paper with gold and silver designs on them. I love the richness that they add to the bags. A couple of satin handles, and the gift bag is ready for use! These bags are small in size (about 6 inches by 4 inches) and are ideal for gifting jewellery. Unfortunately, I have not been able to find any more of this paper, so it is just 2 bags with this gorgeous paper!


The next pair of bags is also from handmade paper, but much thicker paper. The paper came with some beautiful self design and a slight shimmer. The bags were pretty difficult to fold due to the thickness. But once completed, they were very sturdy. The bag was so sturdy that I could have skipped the eyelets and directly threaded the handles into the punched holes! The only reason I went ahead with the eyelets was for uniformity. All my bags have eyelets and these were no exception :)


The next set were bigger bags (~ 8 inches by 6 inches), made from a variety of handmade paper. Here I experimented with the handles, using satin ribbons, rope-like wires, beautiful lavender-coloured organdy ribbon. Very pleased with this set too :)

Finally, I had some lovely polka dot gift wrappers that I converted into paper bags! The paper wasn't very thick though, so I will be able to use them only for the lightest of gifts, but still they are so beautifully attractive and I will be careful about who I gift them to!


The Stand in the Corner of the Desk Drawer Box (Whew! That is a mouthful!) is deceptively simple box/pen stand designed by Thoki Yenn, the well known designer of origami magic rings.

The stand is folded from a A4 sheet. I would suggest regular copy paper or something thicker for folding this model. Copy paper results in a pretty good stand, but the best stand is from scrapbooking paper (160 gsm or more).

Some things that I did incorrectly the first time (Diagram link below):

1. In Step 2, when making the 3 vertical folds, start from the left. The first fold is made at the diagonal nick made in Step 1.

2. Step 4 - easier if these are made as mountain folds rather than valley folds.

3. In Step 6, the little crease between the first vertical and the 3rd horizontal creases does not extend up to the 2rd horizontal crease, but with the crease before that.

4. Same with the next crease (between the first vertical and 4th horizontal creases). This is not so well defined as the previous crease and the first time I folded the box, I didn't make this crease, rather folded it while collapsing along the other pre creases.

In case you are giving this model a try, I hope that helps :)


Model Details:

Model: Stand In The Corner Box

Creator: Thoki Yenn

Difficulty Level: Low Intermediate

Paper Ratio: A4

Model Size: ~2.5 inches tall

Instructions: Erik Demaine

If you are wondering if I have abandoned the blog, well, that isn't happening any time soon! But I haven't been making a lot of origami per se. More of origami jewelry and experimenting with paper - what paper to use for what, size - what size is good for adults/children, design - what design is easy to work on and so on and on.

And the result of those experiments are the earrings and the bracelet. The butterfly earrings, I have found, are liked by children, but are much too large for them. So now I need to figure out a good size for kids. And folding such small sizes isn't a lot of fun either. And requires practise. The wreath earrings are also adult sized and I absolutely love them!  I have made them in a variety of colours and these are my favourites.


Coming to the bracelet, this was a complete experiment. And I am quite pleased with the result :) I have wanted to make these bracelets for a long time, but never did find the toggle clasps, till recently. Unfortunately my length measurements were off target, and the bracelet is a little small for adults but will fit a child perfectly - much to my daughter's delight! More bracelets on the way..


And I also ended  up making a rose ring - a tiny little kawasaki rose, fit on a ring base with a little pearl at the centre. I admit it does require a little tweaking though. Folding a kawasaki rose from such a tiny square requires more practise than I have had.

I put the ring through a stress test by mistake - washed my hands while wearing the ring, but thankfully I had glazed it before. The ring got completely drenched, so I set it aside to dry fully. And wonder of wonders, once dry, absolutely nothing happened to the ring! So if you are worried about buying paper jewelry, do remember that they are pretty water-resistant once glazed and if you do get them wet, just allow them to dry completely before using them again.

The Kawasaki origami rose is something every origamist tries. I too did. But my first attempt, about 3 - 4 years back, was not much of a success and that put me off roses.

But recently, there was a post in one of the Facebook groups I belong to, with pictures of their origami roses. So I decided to give it another go. I started with a 6 inch square and ended up with a pretty good rose in pink. Then decided to see what would be the smallest rose I can fold. So worked with a 5-inch square next, then 4, then 3. After that, 2 inches looked quite small, so switched over to cms then! The next roses were with 6 cms, 5 cms and 4 cms squares. The 4 cms square resulted in a rose small enough to become an earring. And that would be my next project I hope. The pale pink rose (next to the smallest rose) is my favourite one, though it was quite difficult to fold.

After folding all of 8 roses, one thing I realised was that the creases were the most important part of folding these roses. I found that the softer my creases, the better looking my rose. So when I creased well, as I usually do, I ended up with an angular rose which isn't very appealing. And now I think I will get started on more teeny tiny roses and try to make them into earrings :)

Model Details:

Model: Rose 

Creator: Toshikazu Kawasaki

Book: Origami for the Connoisseur
 

Author: Kunihiko Kasahara, Toshie Takahama
 

Difficulty Level: High Intermediate

Paper Ratio: Square

Paper Size: varying from 6 inches to 4 cms

Model Size: varying from 1.5 inches to 1 cm

Tutorial: Youtube

The origami buckyball is the representation of the Buckminster Fullerene molecule - a stable form of carbon. The other 2 are, of course, diamond and graphite.

Some interesting facts about the buckyball:
  • The buckyball family is an allotrope (different forms of an element - here, carbon) of carbon, very different from diamond and graphite.
  • The buckyball is made from 60 atoms of carbon
  • The shape resembles a football - 20 hexagons and 12 pentagons
  • Each atom has 2 kinds of bonds - double bonds between 2 hexagons and single bonds between a hexagon and a pentagon
That is enough Chemistry I think!

As for the origami buckyballs, one version of these buckyballs can be made using PHiZZ Units. These buckyballs are very commonly done as they are made from squares and are relatively easier to complete. 

The other version of the buckyball, what I have done here, is folded from units created by Rona Gurkewitz and Bennett Arnstein. The units are folded from equilateral triangles. Cutting the triangles, 60 of them, is 50% of the  job! Folding those 60 triangles into the buckyball units completely another 30%. Assembling the units is what I found easiest and I believe that amounts to only 20% of the entire process :) And behold, a buckyball!

It is usually suggested that you use paper coloured on both sides. That ensures that the buckyball has the same colour throughout. But when I assembled with single-sided paper, I realised that the contrasting colours meant that I can clearly see those stars in the hexagon/pentagon faces. I like that. And maybe, one day, when I give it another go, I will try using copy paper and see how that compares to this one.

Model Details:

Model: Buckyball

Creator: Rona Gurkewitz and Bennett Arnstein

Book: Multi Origami Polyhedra

Authors: Rona Gurkewitz and Bennett Arnstein

Difficulty Level: High Intermediate

Paper Ratio: Triangle

Paper Size: 4 inches

Model Size: ~ 5 inch in diameter

Modules: 60

Tutorial: Youtube 

While folding the origami Mina from my previous post, I realised that it resembled Mio Tsugawa's Arabesque. Except of course, that for the arabesque the flaps are curled to give that rounded, softer look and we do not do that for the mina.

That does not mean we cannot add those curls :) So that is what I did. And it turned out to be exactly like the arabesque. In fact, comparatively speaking, I found the mina easier to assemble than the arabesque.

For this model, I worked with shades of orange and I am quite delighted with the outcome. Since I had orange yarn, I ended up making a tassle and converted my kusudama into an ornament. The problem is, I am so in love with the ornament that I have no intention of hanging it anywhere and allowing it to get dull or dirty! So it is already packed and kept safe, to be taken out only for special occasions and exhibitions :)


Model Details:

Model: Mina 

Creator: Enrica Dray

Difficulty Level: High Intermediate

Paper Ratio: Square

Paper Size: 3 inch squares

Model Size: ~4 inches in diameter

Modules: 30

Diagram: Origami Modulari


The origami Mina is a modular origami designed by Enrica Dray. The model is a dodecahedron, assembled from 30 squares of paper.

The individual modules are pretty easy to fold. Assembling is done without any glue. Once you slide a flap into a pocket, it holds very well and taking it apart gives trouble. So the model is very stable and does not require any glue at all.

There are 2 ways to assemble the model - when joining the modules, we align the creases between the modules. Folding this crease down ie., making it into a valley fold, gives the first assembly. Folding it up and turning it into a mountain fold gives the second assembly. I have done the second version.

Model Details:

Model: Mina 

Creator: Enrica Dray

Difficulty Level: High Intermediate

Paper Ratio: Square

Paper Size: 3 inch squares

Model Size: ~4 inches in diameter

Modules: 30

Diagram: Origami Modulari 

One of my favourite modular origami is Tomoko Fuse's Little Turtle Kusudama. I had made them a couple of years back, using beautiful, vibrant paper.

I had a workshop coming up and wanted to remake this model, since my previous kusudamas have been distributed long back! While previously, I had using paper that had colourful flowers on a white background, this time I wanted to go with a softer tone. And I quite like the paper I have used - cream coloured paper with a gold pattern on it. I had bought this paper more than a year back and found it while going through my huge stack of paper. 

What say you? Does it look good? Or is it too dull?

PS: While entering the model details, I realised that I had previously marked the difficulty as high intermediate. Well, it was quite difficult for me then. But now, I think it is a low intermediate model. So what do I do? For now, I am going to continue marking it as high intermediate, because my blog is mostly used by beginner origamists. And I believe I need to re-look at my past posts to ensure that the difficulty level is labelled correctly ie., for beginner origamists :)

Model Details:

Model: Little Turtle Kusudama 

Creator: Tomoko Fuse

Book: Multidimensional Transformations Unit Origami
 

Author: Tomoko Fuse
 

Difficulty Level: High Intermediate

Paper Ratio: Square

Paper Size: 3 inch squares

Model Size: ~4 inches in diameter

Modules: 30

Tutorial: Youtube 
Well, after a long time I worked on some modular origami - the origami football (soccerball). Absence really does make the heart grow fonder, cos I absolutely loved making the football. It helped that it very closely resembles a real football, so much so that my daughter wanted to kick it around! And everyone in my house is in love with it 😊

Unlike most modular origami, the individual modules are made from equilateral triangles. For my football, I had used A5 sheets (If you have A4 ie., the regular copy paper, cut it in half horizontally to give 2 A5 sheet). Each A5 sheet gives 2 white triangles and 3 black triangles. A total of 20 white pieces and 12 black pieces are needed. So that makes it 10 white A5 sheets and 4 black A5 sheets (In A4 terms, it is 5 white and 2 black A4 sheets).

The white and black pieces are folded differently, as we need white hexagons and black pentagons. While assembling the ball, each black pentagon will be surrounded by 6 white hexagons. You should be aware that of these 6 white hexagons, one side will have a pocket which will be empty. That is because of the combination of hexagons and pentagons and nothing to worry about :)

So give it a go and have fun with the football. It is pretty robust, so you can even throw it around a bit!

Unfortunately I am no longer able to find the diagram for this model. It used to be hosted on Mark Leonard's site but it is no longer available. But all is not lost! I have linked below a youtube tutorial for making said football.

Model Details:

Model: Football

Creator: Mark Leonard

Difficulty Level: High Intermediate

Paper Ratio: Triangle

Paper Size: A4 and A5 paper

Model Size: ~4 inches in diameter

Modules: 32

Tutorial: Youtube

Summer is a time for beach-themed projects and challenges I think. Last year, I had made a summer-themed origami composition. This year, a Facebook group had a challenge for May, which comes to a close today. I tend to wait till the last minute before completing projects! The theme was simple - Beach. Anything to do with the beach is good. The challenge was that we are not to use our usual craft medium. In my case, paper. That proved very complex for me!

Anything and everything crafty that I can think of, is of paper. I am pretty good with my sewing machine but I really couldn't find something that I could do easily. I finally chanced upon this beach-themed wreath that seemed do-able. So I went about collecting shells, pearls and more shells! And managed to complete my wreath today.. finally!!

I started off with a wreath base. After completing 2 wreaths, the base is turning out to be pretty quick to make. And very eco-friendly, to boot! And this time, instead of adding my shells directly to the base, I wound it in cream-coloured satin ribbon first. This gave me a three-fold advantage - the back of the wreath (see next pic) had a very smooth and neat finish, the gaps between the shells and pearls wasn't obviously seen and the sheen in the ribbon added a nice touch to the wreath. To wind the ribbon and to add the shells, I used my latest craft purchase - a glue gun :) Ah, the joy of getting things to stick well and quickly, without messing up your fingers! After the ribbon was done, I started adding the bigger shells, followed by the smaller ones and finally the pearls.

One thing I hadn't anticipated was the weight  of the wreath. So now I need to get some good thick ribbon to ensure that the whole thing doesn't fall down when I hang it! And that is my beach-themed project for this summer :)


The Little People's Festival, which was the event I was participating in, an event which I was eagerly looking forward to, finally happened on 27th April. And if you are wondering why I took so long to post details of the event, well, I just turned lazy after a month-long effort of preparing for the sale!

The day of the event started off bright and sunny as most days do in this part of the world! The event was mainly for little people, so we had a number of them participating in some of the games and events planned for them. And once their events were completed, a number of them visited the stalls that sold handmade things.

The PaperNPearlz stall was near the entrance, so we had a lot of visitors. My earrings turned out to be quite a draw too and I am ecstatic! A lot of people had difficulty believing that it was paper until I assured them that it really was :) Kids loved star earrings and I regretted not making more of them. Almost all my star earrings were sold by the end of the day.

Butterfly earrings were another hit. They were small enough for even kindergarten children to wear, so they also sold quite quickly. The geometric earrings and heart earrings were the next popular ones. Leaf earrings and wreath earrings weren't as popular as I would have liked. Smaller sizes would have been more appealing I think.


I had asked my sister-in-law to help out. She, being the amazingly creative person that she is, had worked on some very pretty handmade cards. She had a variety of punches which she had put to good use :) And our recent purchase of card stock paper was a true blessing! A surprising number of children were quite delighted with the cards and picked up quite a few! So did their moms.. and me.. and my parents.. I must say, it is lovely to know that people still give greeting cards in this age of e-cards and online greetings.

And finally, I had made a few hundred little stars and sold them in packs of 15, to be used as confetti, table decor, on gift tags or as I had done - to teach children to count! These star packs were also very popular among the little people. They loved the colours and that they could choose the colours they wanted :) I had a girl pick out only red, yellow and orange stars - amazing how children know exactly what they want!

Well, we all had a lovely time. It turned out to be all that we had wanted it to be. I am delighted that people liked the earrings. I made a lot of new crafty friends and I had a dozen or so people ask me if I would please conduct origami classes. A big thank you to the organizers of the Little People's Festival, for the invite, for their encouragement and their support :)

And of course, all this would not have been possible without a lot of support from my family - My husband, patient with me, even though he never understood why I spent so many hours making tiny little stuff with paper, my Dad, always a support and my constant admirer, my Mom, full of ideas and themes and our cashier, my brother, a source of inspiration who gave me a lot of tips on how to market better, my sister-in-law, a very creative person who helped out with the lovely cards, also my biggest critic encouraging me to go a step further, a fellow paper-buyer and paper enthusiast and my daughter, my biggest fan, my model who patiently helped with my trials to get my earrings to the right size. And finally, I cannot complete the post without thanking God, for the talent, for the opportunity and for all the support and encouragement that I have received.

And with that, I come to end of my first public event! Yay!

This month has been a busy time for me, as I am getting ready for an event. And here is what I have been working on..

These stars set in spirals are decided difficult to make! I wish there were some instrument that would make this easier, but for now, I make these spirals by hand. And those spirals add so much of beauty to these earrings. I have also made star earrings with a single crystal and a few with a coil as a dangler but these, I hope, will be the highlight of my star earrings. In addition to red, I am also making these earrings in rainbow colours.


Another of the star earrings. I must admit this is the first time I am attempting any wire work. And simple as it should be, it has its own challenges for a beginner. Considering the number I am planning on making, I think I should soon turn out to be fairly good at making these spirals! And these star earrings in spirals are by far my favourite in this collection! 


These heart earrings are another favourite of mine. Most of these earrings have a little dangle and are about 5-6 cms in height. Little Miss insisted that I make a few smaller ones too - she is very sure that kids will want to buy them and the ones with the dangle might be too big for them! :) 


Leaf earrings always, always catch the eye. Any time I have worn my leaf earrings, I always receive compliments on my earrings. And people find it so hard to believe that it is paper! I am making these earrings in 2 sizes - 3 cms and 4 cms. Most of them are made from pearlescent momigami paper which adds a beautiful sheen to the earrings. Once again, I am making them in a variety of colours. The little pearl on the top goes well with the pearlized paper :)


And finally, wreath earrings are something that I always make. Made from 16 little bits of paper, they are pretty difficult to handle but look great when worn! I am making these earrings in a variety of washi and chiyogami paper. The gold accents in the chiyogami paper adds definite appeal to the earrings. I am also trying to turn them into studs (earrings on posts instead of fish hooks), though I might not be able to work it out in time for the event. But even on fish hooks, these earrings aren't all that dangly or large.

I have more earrings that I am working on and will post them soon.

This origami bear head bookmark is designed by Klaus-DieterEnnen and isn't very difficult to fold. Duo-coloured paper with brown and black might work out very well I think. Brown for the head and black for the little nose.

The diagram starts with a square base (Instructions).

Model Details:

Model: Bear Bookmark 

Creator: Klaus-DieterEnnen

Difficulty Level: Low Intermediate

Paper Ratio: Square

Paper Size: 5 inch squares

Model Size: 3.5 inches tall and 2.75 inches across

Diagram: The Origamist - Klaus-Dieters Origami Site