Showing posts with label modular. Show all posts

Let me start off by saying that the more I read about origami snapology, the more information I find! Plenty of tutorials are available to make the basic snapology unit. As for assembling the units into various polyhedra, there are tutorials for assembling the Icosahedron but all other polyhedra are strictly DIYs :) But once we understand the polyhedral shapes, using snapology units to form those shapes is fascinating, though challenging.

To start off with the basics, snapology is a term coined by Heinz Strobl and involves folding units from paper strips. The beauty of snapology is that, these units can be used to form any polyhedra, starting from the Tetrahedron (4 vertices and 4 triangular faces) to the complex Truncated Icosidodecahedron (120 vertices and 63 polygonal faces!).

The basic snapology units are assembled along the wire frame of a polyhedra (for a polyhedral solid, when the faces of the solid are removed, the edges along remain. These edges, that retain the shape of the solid, is the wire frame) to form the various shapes. Each unit has 2 parts - a strip that forms the basic shape (a triangle for the icosahedra in this post) and a second strip that acts as a connector and links 2 shapes.

The icosahedra has a total of 12 vertices and 20 triangular faces. So we need 20 strips to form the 20 triangles. To determine the number of connector units, we need to determine the number of edges that the polyhedron has. Here's where a little Maths helps - the Euler's formula, which goes thus:

Euler's Formula:

V + F - E = 2
where V = number of vertices, F = number of faces and E = number of edges

We need E, so the formula works out as
E = V + F - 2

For the icosahedron, E = 12 + 20 - 2 = 30.

So, we need a total of 50 strips (20 for the triangles and 30 for the connectors). I used A4 sized paper, cut into 8 strips each, which I then cut into halves. So a single A4 gave me 16 strips. So 3 A4 sheets + 1 additional strip gave me the 50 strips I required.


Model Details:

Model: Icosahedron using Snapology 

Creator: Heinz Strobl

Difficulty Level: Low Intermediate

Paper Ratio: A4 paper cut into 8 strips

Model Size: ~4 inches tall

Instructions: Haligami

Tutorial: Youtube

The origami buckyball is the representation of the Buckminster Fullerene molecule - a stable form of carbon. The other 2 are, of course, diamond and graphite.

Some interesting facts about the buckyball:
  • The buckyball family is an allotrope (different forms of an element - here, carbon) of carbon, very different from diamond and graphite.
  • The buckyball is made from 60 atoms of carbon
  • The shape resembles a football - 20 hexagons and 12 pentagons
  • Each atom has 2 kinds of bonds - double bonds between 2 hexagons and single bonds between a hexagon and a pentagon
That is enough Chemistry I think!

As for the origami buckyballs, one version of these buckyballs can be made using PHiZZ Units. These buckyballs are very commonly done as they are made from squares and are relatively easier to complete. 

The other version of the buckyball, what I have done here, is folded from units created by Rona Gurkewitz and Bennett Arnstein. The units are folded from equilateral triangles. Cutting the triangles, 60 of them, is 50% of the  job! Folding those 60 triangles into the buckyball units completely another 30%. Assembling the units is what I found easiest and I believe that amounts to only 20% of the entire process :) And behold, a buckyball!

It is usually suggested that you use paper coloured on both sides. That ensures that the buckyball has the same colour throughout. But when I assembled with single-sided paper, I realised that the contrasting colours meant that I can clearly see those stars in the hexagon/pentagon faces. I like that. And maybe, one day, when I give it another go, I will try using copy paper and see how that compares to this one.

Model Details:

Model: Buckyball

Creator: Rona Gurkewitz and Bennett Arnstein

Book: Multi Origami Polyhedra

Authors: Rona Gurkewitz and Bennett Arnstein

Difficulty Level: High Intermediate

Paper Ratio: Triangle

Paper Size: 4 inches

Model Size: ~ 5 inch in diameter

Modules: 60

Tutorial: Youtube 

While folding the origami Mina from my previous post, I realised that it resembled Mio Tsugawa's Arabesque. Except of course, that for the arabesque the flaps are curled to give that rounded, softer look and we do not do that for the mina.

That does not mean we cannot add those curls :) So that is what I did. And it turned out to be exactly like the arabesque. In fact, comparatively speaking, I found the mina easier to assemble than the arabesque.

For this model, I worked with shades of orange and I am quite delighted with the outcome. Since I had orange yarn, I ended up making a tassle and converted my kusudama into an ornament. The problem is, I am so in love with the ornament that I have no intention of hanging it anywhere and allowing it to get dull or dirty! So it is already packed and kept safe, to be taken out only for special occasions and exhibitions :)


Model Details:

Model: Mina 

Creator: Enrica Dray

Difficulty Level: High Intermediate

Paper Ratio: Square

Paper Size: 3 inch squares

Model Size: ~4 inches in diameter

Modules: 30

Diagram: Origami Modulari


The origami Mina is a modular origami designed by Enrica Dray. The model is a dodecahedron, assembled from 30 squares of paper.

The individual modules are pretty easy to fold. Assembling is done without any glue. Once you slide a flap into a pocket, it holds very well and taking it apart gives trouble. So the model is very stable and does not require any glue at all.

There are 2 ways to assemble the model - when joining the modules, we align the creases between the modules. Folding this crease down ie., making it into a valley fold, gives the first assembly. Folding it up and turning it into a mountain fold gives the second assembly. I have done the second version.

Model Details:

Model: Mina 

Creator: Enrica Dray

Difficulty Level: High Intermediate

Paper Ratio: Square

Paper Size: 3 inch squares

Model Size: ~4 inches in diameter

Modules: 30

Diagram: Origami Modulari 

One of my favourite modular origami is Tomoko Fuse's Little Turtle Kusudama. I had made them a couple of years back, using beautiful, vibrant paper.

I had a workshop coming up and wanted to remake this model, since my previous kusudamas have been distributed long back! While previously, I had using paper that had colourful flowers on a white background, this time I wanted to go with a softer tone. And I quite like the paper I have used - cream coloured paper with a gold pattern on it. I had bought this paper more than a year back and found it while going through my huge stack of paper. 

What say you? Does it look good? Or is it too dull?

PS: While entering the model details, I realised that I had previously marked the difficulty as high intermediate. Well, it was quite difficult for me then. But now, I think it is a low intermediate model. So what do I do? For now, I am going to continue marking it as high intermediate, because my blog is mostly used by beginner origamists. And I believe I need to re-look at my past posts to ensure that the difficulty level is labelled correctly ie., for beginner origamists :)

Model Details:

Model: Little Turtle Kusudama 

Creator: Tomoko Fuse

Book: Multidimensional Transformations Unit Origami
 

Author: Tomoko Fuse
 

Difficulty Level: High Intermediate

Paper Ratio: Square

Paper Size: 3 inch squares

Model Size: ~4 inches in diameter

Modules: 30

Tutorial: Youtube 

Hacky Sack is a football game played by 2 players. The origami hacky sack is an angled modular made from 30 units. The design is by Winson Chan. The modules are not too difficult to fold. The assembly is slightly more complicated and the end result is a very solid sphere that does not require any glue.

The sphere is assembled in modules of 3 and then joined together into pentagons. And joining 30 units results in the dodecahedron, with little triangular corners and a whole lot of open spaces.

I found it an interesting and artistic model to fold. And I must say I love the combination that I have chosen as well. The combination of green-yellow-orange is always a pleasure to look at. Makes one think of bright, sunny days!


Model Details:

Model: Hacky Sack 

Creator: Winson Chan

Difficulty Level: High Intermediate

Paper Ratio: Square

Paper Size: 4 inch squares

Model Size: ~6.5 inches in diameter

Modules: 30

Diagram: Origamidiagram.com 

The Dodecaedro Traforato or Perforated Dodecahedron is a modular origami by Silvana Betti Mamino. Like most modular origami, the modules are pretty easy to fold. They are folded from a A4 sheet. Well, the A4 is actually cut into 4 rectangles horizontally. I felt A4 strips would be too big, so worked with A5 sheet cut into 4 rectangles. Worked perfectly well :) I used printer paper - 5 colours and 6 strips in each colour.

Folding printer paper wasn't that easy - 80 gsm paper requires more effort to fold than 60 gsm, doesn't it? Assembling for me, was the most challenging part. The reason was because of the colours. I wanted to ensure that there was some kind of uniformity in the assembly and after 3 attempts, I finally managed it I think.

The modules hold together without glue once fully assembled. But I didn't find it terribly stable, so if you will be moving it about, then a little glue helps. If you are assembling without glue, ensure you have a whole bunch of paper clips to hold the modules in place.

Model Details:

Model: Dodecaedro Traforato

Creator: Silvana Betti Mamino

Difficulty Level: High Intermediate

Paper Ratio: Rectangles from A5

Paper Size: 2.1 inches by 5.8 inches

Model Size: 4.5 inches diameter

Number of Modules: 30

Instruction: Modulandia.it

The dodecahedron kit is a part of a series of similar kits from the book 'Polyhedron Origami', by Miyuki Kawamura. The other kits in the series include the Edge Module, Tetrahedron, Octahedron and Icosahedron kits.

Each of these kits are made up of 2 kinds of modules - the vertex modules (which forms the corners of the polyhedron) and the edge modules (which connects 2 vertex modules). The vertex module is different for different polyhedra, with changes in the angle and in the number of arms radiating from it.

The dodecahedron kit is made from 50 modules - 20 dodecahedron vertex modules and 30 edge modules. The vertex modules have 3 radiating arms, so are connected to 3 edge modules. 5 such vertex modules link together to form 1 face of the dodecahedron. 12 such faces are joined together to form the dodecahedron.

I found it an interesting piece to fold and might also fold the other kits if possible. The only disappointment for me was that I had used single-sided paper. And when folding the vertex modules, a little of the white can be seen at the back. I didn't think much of it till I started assembling the piece and realised that, since it is a structure with a lot of big windows, the back of the modules are also visible - as can be seen in the pic! So, if you are folding this, remember to use paper coloured on both sides, at least for the vertex modules.

The model is pretty stable but if you are going to move it around a lot, then I suggest a dab of glue at the joints. Else the vertex modules tend to put out of the edge modules. And another thing, remember to use fairly small paper. I used squares of 2.5 inches and ended up with a model that measured about 7 inches across.

Model Details:

Model: Dodecahedron Kit

Creator: Miyuki Kawamura

Book: Polyhedron Origami

Author: Miyuki Kawamura

Difficulty Level: High Intermediate

Paper Ratio: Square

Paper Size: 2.5 inches

Model Size: 7 inches diameter

Number of Modules: 50

Since of late I have recently been working on easy origami, I thought I would try out something a bit more challenging. This hydrangea cube was a good attempt and I am quite pleased with how it has turned out 😀

How to go about this? Well, we need to initially make 6 of Shuzo Fujimoto's hydrangea tessellations. In origami, tessellations are patterns that are usually folded from a single sheet of paper, that repeat themselves as many times as needed. They usually provide a dimensional appearance.

The hydrangea tessellation is one of the simpler designs. The paper that I have used is regular kami paper. The paper didn't tear while making all those sinks and pops!

Once the 6 hydrangeas are completed, it is just a matter of joining them in a cube. Joins are made by creasing a mountain fold along each of the longer petals, on all 4 sides. The creased corner can be slid into the adjacent hydrangea to hold it in place. Fitting the last of the 6 turned out to be very frustrating and I almost tore up the model! Only the thought that I would have to refold 6 hydrangeas, kept me from doing it!! 😄😄

And if you are the adventurous sort, you can also try the regular snooze assembly, made from 30 units!

Model Details:

Model: Hydrangeau Cube 

Creator: Shuzo Fujimoto

Difficulty Level: High Intermediate

Paper Ratio: Square

Paper Size: 8 inches

Instructions (for making a single hydrangea tessellation): British Origami

Tutorial: YouTube

Modules: 6


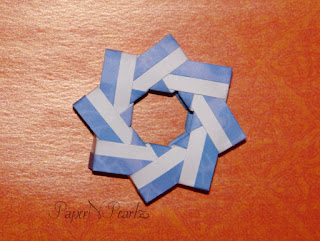
Yet another design by Martin Sejer Andersen that I recently folded :) This was initially named 'The Unnamed Ring'! and has recently been christened the Braided Ring.

The ring is made from 14 modules. The modules start off with folding into fifths. So a template comes in handy. I quite like the little bits of colour (white in my case) that can be seen at the edges and at the centre of the ring. Btw, the ring is a 3D ring, but can easily be converted into a flat 2D version. But I did find the 3D version more stable than the 2D one!


Model Details:

Model: Braided Ring 

Creator: Martin Sejer Andersen

Difficulty Level: Low Intermediate

Paper Ratio: Square

Paper Size: 3 inches

Model Size: ~ 4 inch diameter

Tutorial: Youtube

Modules: 14

I love folding wreaths and rings, especially the 3D variety. And recently, I found this Alpha Centauri Ring, designed by Martin Sejer Andersen, a good and easy ring to fold. It is a 3D ring, made from 8 units. The fold starts with dividing the paper into thirds. You can of course, approximate it and fold, but much simpler to fold a template and use that to fold the other modules. The Youtube tutorial (link towards the end of the post) clearly demonstrates the way to go about it.

A great Christmas decoration I think. And with Christmas fast approaching, I think I should get busy making these in Christmas colours :)


Model Details:

Model: Alpha Centauri Ring 

Creator: Martin Sejer Andersen

Difficulty Level: Low Intermediate

Paper Ratio: Square

Paper Size: 2.75 inches

Model Size: 2.5 inch diameter

Tutorial: Youtube

Modules: 8

The origami lotus is yet another traditional, modular model and one that I had tried out recently. The assembly for the lotus is different from what I had done till date.

After folding the individual modules (there are a total of 8 modules for the flower and 4 for the leaves), we assemble the modules in sets of 3 (2 flower modules and 1 leaf module) and tie them together. Once everything is held tight in place, then we start forming the petals and leaves.

The beauty of the flower lies in the way the petals are shaped. The inner petals can be closed into the centre to give the appearance of a flower just starting to bloom. I think mine has the look of a fully opened flower.

Altogether, an interesting and ingenious model to fold.

Model Details:

Model: Lotus

Origin: Traditional

Difficulty Level: Low Intermediate

Paper Ratio: Rectangle

Paper Size: 5.5 inches * 3.5 inches

Model Size: ~4 inches

Modules: 12

Tutorial: Youtube 

One of the first earrings that I tried was, naturally, the origami star earrings. Once I became more adept at making these tiny earrings, I tried my hand at more complex pieces and that is when these rainbow earrings came into existence.

These are made with 16 units each and once assembled, I glazed them to give them added strength. The best part about origami earrings is that they are super light! So Little Miss is quite delighted to possess it, though it is a tad too big for her little ears!!

Origami Lemon and Green Sun Earrings


Here is the final cube from the book 'Modular Origami Polyhedra'. The Ninja Star Cube is also made from 12 modules. The one I tried is the second cube. This one is a bit more ornate than the original ninja star cube. It has got a couple more folds which gives a little variety to the folds.

Each face of the cube has the shape of the star in the middle. The star is clearer in the next picture.


Model Details:

Model: Ninja Star Cube 

Creator: Lewis Simon

Book: Modular Origami Polyhedra
 

Author: Lewis Simon, Bennett Arnstein, Rona Gurkewitz
 

Difficulty Level: Low Intermediate

Paper Ratio: Square

Paper Size: 3 inches

Model Size: Square cube with approximate side of 2.25 inches

Modules: 12

Before trying the Ninja Star Modular Cube, I tried out one last cube. This is again from the book 'Modular Origami Polyhedra'. As before, this is from the chapter on Decoration Box System. Almost all the cubes have the same heading, namely, 'Modular Cube', so I am also using the same name :) To be more specific, this is the 8th cube in this chapter. The design is by Lewis Simon.

When I looked at this model, I liked the shape which is different from the usual cube shape. This looks a little like the last modular cube I did, but with more pronounced truncated corners. Assembling the model is different from usual for me. An interesting model to fold :)


Model Details:

Model: Modular Cube 

Creator: Lewis Simon

Book: Modular Origami Polyhedra
 

Author: Lewis Simon, Bennett Arnstein, Rona Gurkewitz
 

Difficulty Level: Low Intermediate

Paper Ratio: Square

Paper Size: 3 inches

Model Size: Square cube with approximate side of 2.25 inches

Modules: 12

Since making my last cube, I have made a few more cubes from 12 sheets of paper. All are from the book 'Modular Origami Polyhedra' . This one is a Sonobe Cube formed from Decoration Box modules. We start off folding as for the decoration box module and then add a few more folds to get the final module.

I first tried this model from 2-inch squares. Quite a tough job!! Folding these thin creases are quite painful, but not as painful as creasing paper that has already been folded 4-5 times!! My thumb took quite a beating! I would strongly advice a bone-folder for this model. Unfortunately, I don't have one, so had to make do with my poor thumb :(

Model Details:

Model: Sonobe Cube from Decoration Box Modules 

Creator: Lewis Simon

Book: Modular Origami Polyhedra
 

Author: Lewis Simon, Bennett Arnstein, Rona Gurkewitz
 

Difficulty Level: High Intermediate

Paper Ratio: Square

Paper Size: 2 inches

Model Size: Square cube with approximate side of 1.25 inches

Modules: 12

As I had mentioned in my previous post, I tried out the modular cube variation, this one in orange. The assembly is the same as the modular cube. The only change, in fact, is the way the initial fold is done, so that the reverse of the paper becomes visible. So it is a good idea to use paper coloured on both sides, in contrasting colours. I preferred using single-sided orange coloured paper. I think it has turned out quite well :)

But in reality, folding the modules turned out to be an unexpected challenge! I had used the same paper size as in my previous cube (1.25 by 3.5 inches). Unfortunately, this model had a couple of additional folds, resulting in really thin strips. And folding those thin strips in such a small paper turned out to be painful!! I used a ruler to ensure that I got the folds right. Thankfully the paper was quite strong, I am sure I would have ended up tearing quite a few modules otherwise!

Model Details:

Model: Modular Box Variation 

Creator: Bennett Arnstein

Book: Modular Origami Polyhedra
 

Author: Lewis Simon, Bennett Arnstein, Rona Gurkewitz
 

Difficulty Level: Low Intermediate

Paper Ratio: Rectangle in ratio 1:2

Paper Size: 1.25 by 3.5 inches

Model Size: Square cube with approximate side of 1.25 inches

Modules: 12

The decoration and modular boxes from the book 'Modular Origami Polyhedra' are beautiful and very tempting! The boxes are all cubes made from 12 modular units. They are quite easy to make as well. And I love the little windows in the cubes.

I had previously tried out the original decoration box and was quite pleased with the results. This time, I tried out the first of the modular cubes, which is actually a variation of Lewis Simon's decoration box.

This turns out to be much more economical than the decoration box too, since it is made from 12 rectangles in 1:2 ratio (a square cut in two). The decoration box, on the other hand, is made from squares. So you can make 2 of these modular cubes for each of the decoration boxes :) Naturally, the size of the cube is also smaller than the decoration box.

While folding the cubes, the one issue I faced was that, the backside of the paper (white in my case), can be seen peeking out in quite a few places! No matter how I folded it, the white was visible :( I guess paper coloured the same on both sides would have been better.

Well, I will be folding a few more of these cubes. The next variation of the decoration box is the next on my list, followed probably by the Ninja Star cube.

Model Details:

Model: Modular Box 

Creator: Bennett Arnstein

Book: Modular Origami Polyhedra
 

Author: Lewis Simon, Bennett Arnstein, Rona Gurkewitz
 

Difficulty Level: Low Intermediate

Paper Ratio: Rectangle in ratio 1:2

Paper Size: 1.25 by 3.5 inches

Model Size: Square cube with approximate side of 1.25 inches

Modules: 12

This wreath is from David Petty's book 'Origami 1-2-3'. I have previously tried out a few projects from this book and promptly lost the book! That is, till I found it during some house cleaning :)

This modular piece sounded interesting, so I tried it out. But as per the design, the wreath does not end with pointed ends. The ends are folded down into the neighbouring module to form a kinda blunted wreath. Check out the next picture for the actual wreath - the one in yellow is the way to go. The pointed end one is not very stable and needs to be glued in place if you actually want to use it somewhere.

I used regular copy paper, cut into 2 inch squares. It resulted in a pointy wreath measuring about 4 inches in diameter and a blunted wreath about 2.5 inches in diameter.

The most curious thing for me, about this wreath was that it requires 13 units! I have never come across another model that required 13 modules :) For the blue one, I did add 14 modules though - it was just a tad more stable with 14!


Model Details:

Model: Wreaths / Flower Wheel

Creator: David Petty

Book: Origami A-B-C

Author: David Petty

Difficulty Level: Low Intermediate

Paper Ratio: Square

Paper Size: 2 inch squares

Model Size: ~4 inches (blue one) and 2.5 inches (yellow one)

Modules: 13 or 14

I love folding spirals and I think the queen of origami spirals would be Tomoko Fuse! So since it has been a long time since I folded boxes with spirals, I tried out this little 4-sided box, from her book 'Let's Fold Spirals'. This box is the second of the 2 square boxes and is a pleasure to fold. It took me about 15 minutes to complete the full box, pretty fast I think.

I had used fairly sturdy paper (4*4 memo paper) to fold it, so the end box was also quite sturdy. I like the shape - the height is greater than the usual origami boxes. The spiral also gives the impression of an even taller box. And the slanting lines add a great touch.

Altogether a delightful box to fold :)


Model Details:

Model: Square Spiral Box

Creator: Tomoko Fuse

Book: Let's Fold Spirals

Author: Tomoko Fuse

Language: Japanese

Difficulty Level: Low Intermediate

Paper Ratio: Square

Paper Size: 4 inches

Model Size: ~2.5 inches tall (the spiral adds half an inch) and 2 inches wide

Number of Modules: 4