Showing posts with label rose. Show all posts

If you are familiar with folding the traditional origami crane and the origami Kawasaki rose, then why not try out the Origami Tsuri Rose - a modified crane with a rose in the centre.

The tsuru rose has been on my to-do list for quite some time. And finally I was able to try it out - mostly because the monthly theme at the Origami Society of Madras is a crane and I didn't want to end up folding the traditional crane :)

The crane is not easy to fold - I would rate it as a high intermediate. And the reason for is, once the pre-creasing is over, immediately on starting the folds, the model becomes 3D. So almost from the beginning (Step 10 in the diagram), we end up folding in the air. And as the folding progresses, there are quite a few layers of paper to fold, which makes it harder to fold or get crisp creases. And getting a good, well-creased crane without crushing the rose in the centre was pretty challenging for me. That said, after I had tried it a couple of times, I was quite happy with the outcome :)


Model Details:

Model: Tsuru Rose

Creator: Satoshi Kamiya

Difficulty Level: High Intermediate

Paper Ratio: Square

Paper Size: 6 inches

Model Size: ~ 5 inches wingspan and 4 inch from head to tail

Instructions: Coisas de papel

In preparation of Valentine's Day next month, I thought I would try out something new. The Kawasaki rose has always been challenging for me, so I decided to make it even more challenging by making a rose ring using the same rose.

I have tried out the rose ring before, but I wasn't too happy with the way it turned out then. But after some practise and some fails, here is one I absolutely love. Goes to a good friend of mine too. Hope she likes it 😀

The paper I have used is pearlized washi paper in a soft peach colour with tinges of gold woven into the paper. The final ring was glazed to strengthen it.


The yellow rose is another one I made using similar paper. I used a bronze ring, which I thought went better with the rose. This was even more challenging, since the paper was smaller than the peach ring. But well, I am happy with the final outcome!! 😃

Model Details:

Model: Rose Ring 

Creator: Toshikazu Kawasaki

Book: Origami Dream World - Flowers and Animals
 

Author: Toshikazu Kawasaki
 

Difficulty Level: High Intermediate

Paper Ratio: Square

Tutorial: Youtube

In the past couple of years, I have made and sold quite a few of my origami earrings online. This has been a fairly easy job for me, since I could make the earrings I wanted and put them up for sale when I wanted to. There was no pressure and it helped me make more and more complex earrings.

This year, for the first time, I got a couple of opportunities to be a part of local market places that sold hand crafted goods. Since I have never been a part of such craft bazaars before, these experiences have been real eye openers!


Let me start off with the many lessons that I learnt during these forays: One - I could not gradually make earrings at my own pace! I needed enough earrings to at least cover the 2 tables that each stall would be provided with. And let me tell you, paper jewelry does NOT occupy space! So in the first event, even though I had about 200 pairs of earrings (Whew! Making them was an immense challenge! It felt like I was spending whole weeks at my work table..), my table looked half full! By the way, my earrings included leaf earrings, star earrings, umbrellas, pine cones, butterflies and hearts.


Two - So since my first stall looked hardly full, I decided that I need to diversify my jewelry. It was not sufficient that I made earrings, I needed to make things that take up space. So I started making bracelets and chains/necklaces. And that is what went into my second stall. I had a bigger variety of earrings - I included rose stud earrings, bird stud earrings, woven earrings, modular and wreath earrings. My bracelets included butterfly bracelets, star bracelets and bird bracelets. But still, I found that my tables did not look filled in!


Three - For my third event, I diversified even more! I included handmade bags, pillow boxes and little Christmas ornaments. And finally I was happy with the way my stall looked :)

Four - For a marketplace, it is not sufficient that you have just your products. In addition, a lot of accessories are needed. A major item was the packaging stuff. I needed boxes/zip lock packs to keep the jewelry in. Then I needed bags to put the boxes in. These bags also had to be handmade bags, to go with the handmade theme. I also found that having a stand listing the price of all the items was very useful. And a sign board was an absolute essential.


Now, these are things that I need not worry about in a online shop and they were all additional expenses! So now I absolutely need to participate in more events just to recuperate all that money that I have invested! :)

Five - A few of the buyers were not able to appreciate handmade works. To them, all I was using was paper. So they believed that I should be selling it for a 10th of the price I quoted. But thankfully, this was a minority. For the most part, people understood the effort that goes into handmade.


Among the positives, the biggest positive was the opportunity to meet a lot of handcraft enthusiasts who had put up stalls in the events. I was amazed at the creativity that I saw. Jewelry, clothes, greeting cards, paper bags, paintings, clay art, terra cotta jewelry, crocheted works - an absolutely mind-boggling array of talents were on display!

Two - I found a lot of people fascinated by paper jewelry! For a lot of them, this was the first time they were seeing something like that. In fact, a lot of them were not aware that my jewelry was made from paper. The moment I said that it was paper jewelry, they did a double take and immediately fingered the jewelry to check that it was in fact paper!


Then they had the usual questions on durability, water resistance etc.

Three - Children were fascinated  with the birds and stars. Young adults loved the butterflies. And those in their 30s were very appreciative of my rose studs. All of them were very appreciative of the effort. Quite a few of them were aware of origami and a few even knew that tiny roses were very difficult to fold. So they were all the more fascinated by the jewelry.


So these events have been learning, yet delightful experiences. I have made new crafter friends, I have got a list of people who want to learn origami, I have new clients who want specific jewelry in specific colours.

While I will continue with my online sale (it is hassle-free as compared to a bazaar!), I would love to participate in yet another event and exhibit more of my jewelry. Though, not any time soon!

If you are wondering if I have abandoned the blog, well, that isn't happening any time soon! But I haven't been making a lot of origami per se. More of origami jewelry and experimenting with paper - what paper to use for what, size - what size is good for adults/children, design - what design is easy to work on and so on and on.

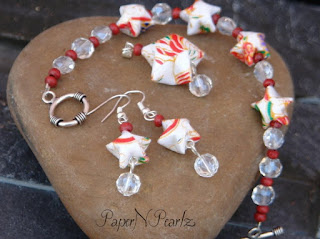
And the result of those experiments are the earrings and the bracelet. The butterfly earrings, I have found, are liked by children, but are much too large for them. So now I need to figure out a good size for kids. And folding such small sizes isn't a lot of fun either. And requires practise. The wreath earrings are also adult sized and I absolutely love them!  I have made them in a variety of colours and these are my favourites.


Coming to the bracelet, this was a complete experiment. And I am quite pleased with the result :) I have wanted to make these bracelets for a long time, but never did find the toggle clasps, till recently. Unfortunately my length measurements were off target, and the bracelet is a little small for adults but will fit a child perfectly - much to my daughter's delight! More bracelets on the way..


And I also ended  up making a rose ring - a tiny little kawasaki rose, fit on a ring base with a little pearl at the centre. I admit it does require a little tweaking though. Folding a kawasaki rose from such a tiny square requires more practise than I have had.

I put the ring through a stress test by mistake - washed my hands while wearing the ring, but thankfully I had glazed it before. The ring got completely drenched, so I set it aside to dry fully. And wonder of wonders, once dry, absolutely nothing happened to the ring! So if you are worried about buying paper jewelry, do remember that they are pretty water-resistant once glazed and if you do get them wet, just allow them to dry completely before using them again.

The Kawasaki origami rose is something every origamist tries. I too did. But my first attempt, about 3 - 4 years back, was not much of a success and that put me off roses.

But recently, there was a post in one of the Facebook groups I belong to, with pictures of their origami roses. So I decided to give it another go. I started with a 6 inch square and ended up with a pretty good rose in pink. Then decided to see what would be the smallest rose I can fold. So worked with a 5-inch square next, then 4, then 3. After that, 2 inches looked quite small, so switched over to cms then! The next roses were with 6 cms, 5 cms and 4 cms squares. The 4 cms square resulted in a rose small enough to become an earring. And that would be my next project I hope. The pale pink rose (next to the smallest rose) is my favourite one, though it was quite difficult to fold.

After folding all of 8 roses, one thing I realised was that the creases were the most important part of folding these roses. I found that the softer my creases, the better looking my rose. So when I creased well, as I usually do, I ended up with an angular rose which isn't very appealing. And now I think I will get started on more teeny tiny roses and try to make them into earrings :)

Model Details:

Model: Rose 

Creator: Toshikazu Kawasaki

Book: Origami for the Connoisseur
 

Author: Kunihiko Kasahara, Toshie Takahama
 

Difficulty Level: High Intermediate

Paper Ratio: Square

Paper Size: varying from 6 inches to 4 cms

Model Size: varying from 1.5 inches to 1 cm

Tutorial: Youtube
Happy New Year, dear readers! I hope this new year is a blessing to all of you.


So I wanted to start off the new year on the blog, with a beautiful project. I was working on a complex origami, which wasn't turning out to be much of a success! So I ended up putting it aside, incomplete for now, and instead started working on an easier (but more time consuming!) project, namely a paper rose wreath.

This rose wreath is made entirely from paper (the pages of an old book, to be precise). I have been working on this wreath for the past week, a few hours each week. And though it was a back-breaking and time-consuming work, I am delighted with the end result! And now it hangs proudly in my work room and I keep admiring it every few mins!! I know, vanity indeed!!

The purpose of the rose wreath was two-fold. One, I wanted a project for New Year and two, I wanted to try out a recent purchase of mine - the EK Success Circle Scissors. It arrived a few days back and ever since, I have wanted to do something with circles. And these roses start off as circles, so it was a perfect way to start using my scissors. And I must say, I am absolutely fascinated with the scissors! I needed to cut about 250 circles (that is how many roses there are in the wreath) and with the circle scissors, this was a piece of cake - all done in less than an hour :)

Of course, making the roses was the major work. It took me about 8-10 hours to complete. The base can be a foam wreath base. But I had made my own wreath - cardboard cut in shape, lined with bunched up newspaper then layered with tissues that are held down with a mix of glue and water. Allow to dry over night and you have a rock solid wreath base. Glue on roses, add a ribbon - red for a little colour. And voila, your wreath is ready!

I am now thinking of making a Valentine day's wreath, using red roses. What do you think, dear readers?


Model Details:

Model: Paper Rosette Wreath 

Origin: Traditional

Difficulty Level: Low Intermediate

Paper Ratio: Circle

Paper Size: 3 inches in diameter

Model Size: Wreath diameter - 12 inches

No of Units: ~ 250 

Tutorial: Youtube

The Rose Brooch designed by Sy Chen, is a modification of Toshie Takahama's Rose Brooch. It looks best when folded in a dual coloured paper, one side green and the other, possibly red.

The rose isn't very difficult to fold as there are clear instructions available for download, both from Sy Chen's website and from other sites. There is also a video on how to make the brooch.

Model Details:

Model: Rose Brooch 

Creator: Sy Chen

Difficulty Level: Low Intermediate

Paper Ratio: Square

Paper Size: 7 inches

Diagram: Sy's Paper Folding Page

Tutorial: Youtube

The bird base rose, created by James Sakoda, is an easy rose to make, comparatively speaking :) Turns out quite well. I think the rose looks best when the paper size is around 4-5 inches. I first tried it with a 6 inch paper and it turned out a bit too big.

As the name says, the model starts with a bird base, which is the starting point for folding origami birds such as the crane and the flapping bird. The bird base rose is an extension of the bird base.


Model Details:

Model: Bird Base Rose 

Creator: James Sakoda

Book: Origami Flowers

Author: James Sakoda

Difficulty Level: Low Intermediate

Paper Ratio: Square

Paper Size: 4-6 inches

Tutorial: Youtube